
My CNC Journey

I think with many things in life we see something at a particular moment in time and maybe don’t realize what it took to get to that point. It’s so easy to assume that a successful business has always been there or that someone skilled in their craft have always been “that good”. Most people might not understand that at some point that business probably started small and struggled to be successful and that person with an immense talent had failure after failure which eventually produced amazing results. Depending on how long we have been investing in setting up and outfitting our workshops it might be viewed as something similar to someone just getting started. Because of this I like to remind myself of where I was and kind of the path I took to get there. When talking about equipment for the shop it helps us make better decisions about further tool purchases. So I think I’d jot down and share the “journey” in relationship to me having a CNC machine in my shop.
A couple of years ago I was offered a commissioned job for a client that would require multiple exact pockets in some plaques to fit a commemorative coin. Before accepting the job I tried every method I had available to me. Getting one to fit perfectly was a challenge… how was I going to be able to do as many as they needed and all of them to be exactly perfect and identical? Well a CNC machine of course! I had previously thought that a CNC for a small one man shop like mine was completely out of reach until I had seen some people posting about these CNC kits that you assembled yourself. At the time the Shapeoko 2 from Inventables was $650 and incidentally the project that I wanted to take on I would earn $600. This is where it all started!

This might look a bit daunting to some but for others a mere challenge similar to legos or an Erector set from their childhood. Putting together and setting up the Shapeoko 2 was pretty straight forward and with minimal issues I was up and running and was able to knock out that first project for the client with the powerful rotary tool that came with it. I soon upgraded to a more powerful rotary tool and added dust collection.

I quickly realized that this not only added another capability in the shop for client work but also for making things for my shop. As with any kid with a new toy I tried to figure out what all I could get it to do. One of those first projects I made for the shop was a Longworth chuck for my lathe. This of course was only the first of many projects that I would incorporate the CNC.


By this point I realized that the CNC was a tool that definitely had earned its place in my shop and would more than pay for itself in the extra capabilities it provided. It was time to make a proper workstation for the CNC and I decided on a stand up wall hanging one which I designed to save on floor space. You can watch how I made it here and download for free the SketchUp model I made here.

Next I upgraded from the rotary tool to a palm router which really increased not only the speed I was able to run the machine but also the accuracy. 
This upgrade was short lived since Inventables released the X-Carve and also made available upgrade kits for the Shapeoko 2 owners. I was fortunate to be able to work with Inventables on a video showing how I upgraded my Shapeoko2 to the X-Carve (which of course you can watch here). I also increased the size of the CNC to fit the available space on the workstation.

The next step in my CNC journey was the realization that I needed a larger machine and so I decieded to once again upgrade my machine to the largest size that Inventables offers which is 1000 x 1000 mm. This of course also meant that a new workstation was needed. At the same time I was making these upgrades I was able to given the opportunity to work with Jtech Photonics and received a 2.8w laser which I installed on my CNC. You can watch how I not only installed the laser here but also how I was able to make a switch box to go between the laser and the router.

But, this was just another step in my journey as I was able to upgrade once again… but this time the X-Carve was destined for another shop and hopefully will work as hard and teach its new owner as much as it taught me about operating a CNC.

Before getting the new CNC I needed to design and build a work station that would improve on the last two while still incorporating some of the same features like the enclosed dust collection that the last one had and be able to fit this new larger machine.

Once the new work station was built I could start assembling the new CNC. I will admit that due to the design of this new machine the assembly was much easier than my previous experiences. I don’t think you can really compare this new machine to my last simply because of steel vs aluminum, belts vs acme lead screws for the linear drive, and a noticeable size difference in the stepper motors.
I didn’t even wait to be completely finished building this new CNC when I started adding some additional features like drag chains with custom made brackets, dust collection, 2.8w Laser, touch plate, and a few more bells and whistles.

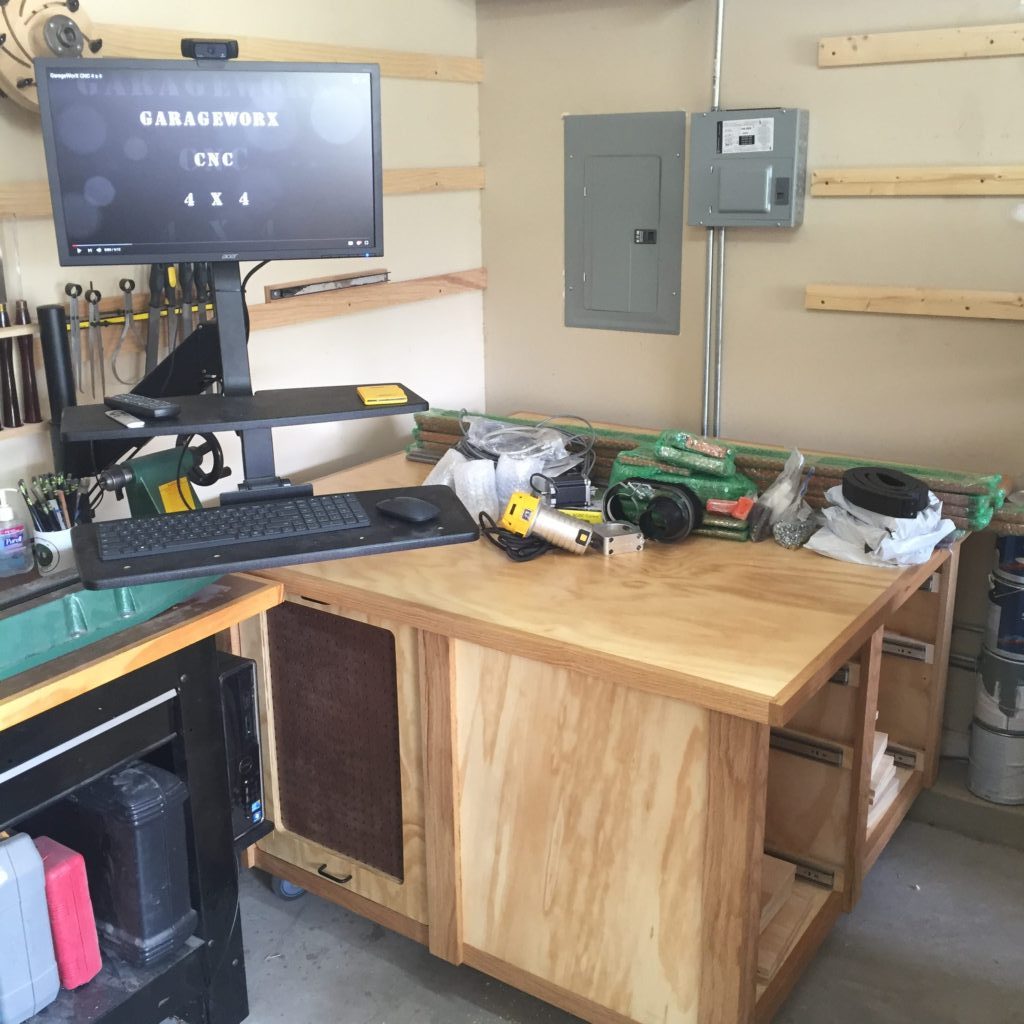
Needless to say I was pretty excited to welcome to my shop my newest shop assistant… the GarageWorx 4×4 CNC! This machine is designed and sold by Dave Gatton at www.garageworxcnc.com who has been designing and building CNCs for years. You can hear an interview with Dave conducted by Bill Griggs at the CNC Router Tips Podcast here. Dave hasn’t just designed several different CNCs constructed of steel but also several made from plywood. As someone who will still admit to being relatively new in the CNC game, I was surprised in how many not only Dave’s plywood CNC’s were out there but also others who had designed and built their own.
It might seem that there was some wasted time, effort, and resources to bring me from where I started to where I am now, but I can’t even begin to explain all the things I have learned along the way. With that being said if the GarageWorx CNC was available at the time and if I had the means to get it then it probably would have made more sense to shorten this journey just a little. But then you wouldn’t have this delightfuly entertaining and enlightening post to read. As I get a little more time with the GarageWorx CNC I will post more of my thoughts and opinions on it. I do want to say (because I have already been asked quite a few times), I did not upgrade because of what the X-Carve wasn’t… but what the GarageWorx CNC was and what additional size and performance it provided. As always feel free to contact me if you have any questions or you can leave comments here.
This is fantastic! I seen you’ve been on Dave’s show! I’ve been aiming to get on there and get involved 🙂
Love your new CNC, thanks for sharing your thoughts!
Great Read!
Thanks Jason!
Noticed in your picture that you and I have very similar router tables. Mine is a combination of the Kreg and New Yankee Workshop designs – is yours one of those?
Yes, the table I made was inspired from the New Yankee Workshop design and I modified it to add some additional storage and to accommodate my height. The top of mine I picked up when Rockler had a sale but the Kreg one is really nice. How do you like yours?
Great info, Mike! I saw your post on the Inventables forum as well. I’m considering a CNC (a friend has the 1000×1000 X-Carve) but I also found the 48×48 GarageWorx. I’m in Atlanta, where I believe Dave is located. I’m a hobbyist but have a decent setup (Festool/Powermatic shop) and think adding CNC capability would be worthwhile. I’d like to potentially do thicker carvings as well as aluminum. I’m curious about what you think of one machine vs. the other. Adding laser capability would be interesting down the road as well. Thanks!
Thanks Greg! From just what you mentioned there I think that you would probably outgrow something like the X-Carve very fast. I plan on doing a full review of the Garageworx CNC at some point but since I’ve been using it for almost a year now I can honestly say that I would recommend it. Dave is right outside of Atlanta and is really approachable and helpful when it comes to anything CNC related. Picking up the GarageworX will definitely save you some money not having to pay for shipping. Feel free to hit me up on email or on whatever social media you use if you have any other questions.
Inspiring info, Mike. Thank you! I’ve been looking at the Garageworx CNC as my introduction to CNC, and will be buying it soon. I want to build the work island first. After seeing yours, I know that’s the one I want to build. I love what you’ve done with the self-contained dust collection. Do you sell your SketchUp plans for this? Thanks for taking the time to putting together a great website and informative blog! I’m even more anxious now to learn and add this to my shop.
other than size what would you say was the difference between the garage works and the x carve? What software are you using for the garage works? thanks so much just found this site.
Mike, the big differences is that the GarageworX is steel instead of aluminum and uses acme threaded rod for the linear drive system instead of belts. I use VCarve Pro as my CAD software and then use UCCNC as my CAM software to run the machine.
thanks for he fast response sounds like a much beefed up better built machine then. Im guessing that allows it to power thru thicker materials, metals, etc better too.
Yes, but there is a lot of other factors that determine feeds and speeds… ie type of spindle and bit.